Staples High School, Westport CT

Bringing
Nutrition
to Connecticut

A club based at Staples High School dedicated to building produce gardens and bringing nutritional education to low income communities.

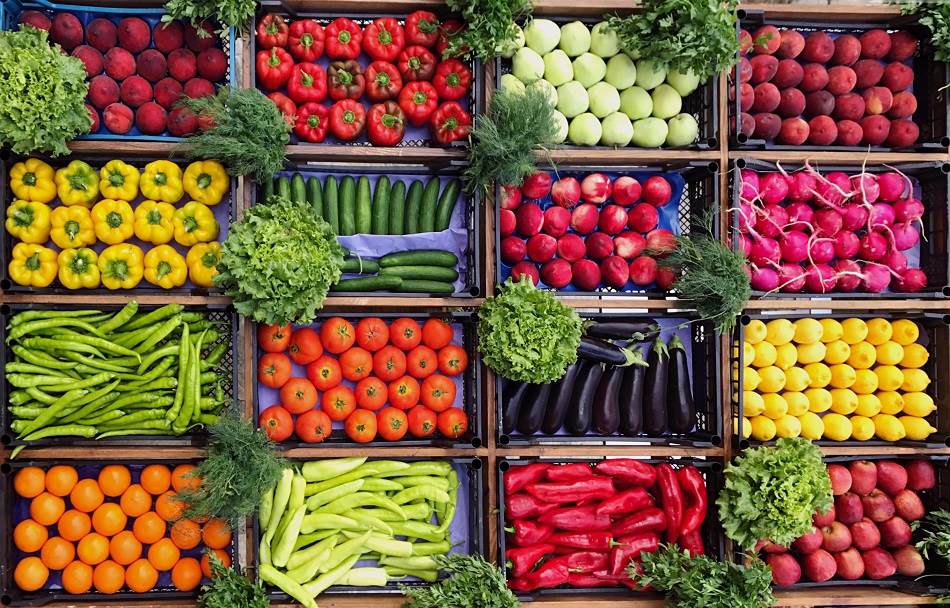
Colorful fresh produce in market crates — peppers, tomatoes, cucumbers, and more
Community Partners Wakeman Town Farm + Green Village Initiative

Our Mission

"Teach people how to grow and use fresh produce — improving nutrition across CT."

We are working towards a future where everyone has access to fresh produce and the facilities to maintain a nutritious diet. Through hands-on garden education, Growing Kit workshops, and local partnerships, Grow CT bridges the gap between food insecurity and sustainable nourishment.

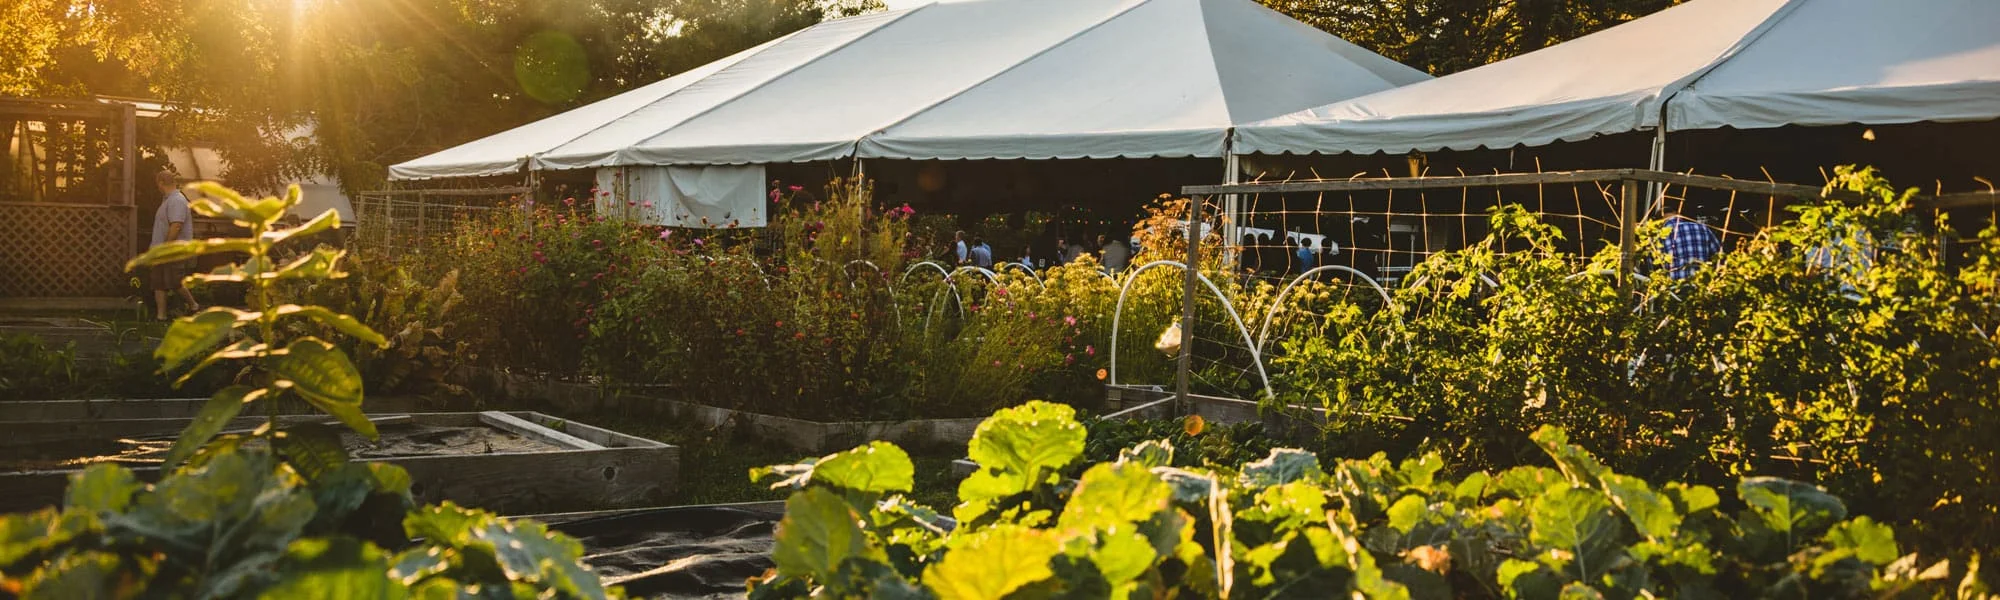
Raised garden beds at golden hour with community members under a tent

Current Partnerships

Wakeman Town Farm + Green Village Initiative

CT Communities served
2 Partner organizations
SHS Based at Staples HS
25 # of Club Members

Container Garden Classes

Learn how to grow your own produce at home with minimal space. Perfect for apartments, small yards, and beginners.

[ Class photo coming soon ]
Beginner

Getting Started with Containers

Class details, schedule, and registration will appear here.

Coming soon — class details, schedule, and registration will appear here.

Pick a Crop, Start Growing

Choose a plant to see how to pot it, care for it, and harvest it.

Herb

Chives

Mild onion flavor from a tough little plant that grows back after every trim.

Light
4–6 hours of sun a day
Water
Medium: 2–3 times a week, or when the top layer of soil feels dry
Best seasons
Spring + Fall

Planting

  1. Fill the pot with moist potting mix. It needs drainage holes.
  2. Sow seeds about ¼ inch deep, or plant a small starter clump.
  3. Keep the soil moist. Seeds are slow and can take 1–2 weeks to sprout.
  4. Leave the sprouts in a clump. Chives grow well crowded together.

Everyday care

  • Water 2–3 times a week, or whenever the top layer of soil feels dry.
  • Chives like cool weather, so spring and fall are their best seasons. Growth can slow in midsummer heat.
  • Feed lightly with a balanced fertilizer about once a month.

Harvesting

  • Start snipping when the leaves are about 6 inches tall.
  • Cut with scissors 1–2 inches above the soil, taking the outer leaves first.
  • Never cut more than a third of the plant at once. It grows back from the base.

Watch out for

  • Yellow tips: usually too much water, or cutting too much at once.
  • Thin, floppy leaves: not enough light.
  • Tiny insects on new growth: aphids. Rinse them off with a spray of water.

Tip: Snip, don't pull. Chives regrow from the base, so you can harvest again and again.

Herb

Thyme

A tough, aromatic herb that prefers to be a little neglected.

Light
8–10 hours of sun a day
Water
Light: about once a week. Let the soil dry out in between
Best seasons
Summer

Planting

  1. Use a pot with drainage holes and a light, well-draining potting mix.
  2. A small starter plant is the easiest way to begin. Thyme seeds are tiny and slow, often 2–4 weeks to sprout.
  3. If you use seeds, press them onto the surface and barely cover them.
  4. Plant at the same depth as the starter pot, water once, and set it in your sunniest spot.

Everyday care

  • Water about once a week. Thyme dislikes wet soil more than dry soil.
  • Give it as much sun as you can: a south-facing window or a grow light.
  • Skip fertilizer, or use only a very light feeding once or twice a season.

Harvesting

  • Start picking once the plant is 4–6 inches tall.
  • Snip stems just above a set of leaves. Avoid cutting into the hard, woody base.
  • Never take more than a third of the plant at once.

Watch out for

  • Brown, mushy stems at the base: too much water.
  • Sparse, stretched-out growth: not enough light.
  • Woody lower stems: normal with age. Trim regularly to keep it full.

Tip: When in doubt, wait another day to water. Thyme forgives dry soil far more easily than wet soil.

Herb

Oregano

Hardy and flavorful, and happiest with lots of sun and little water.

Light
8–10 hours of sun a day
Water
Light: water when the top inch of soil is dry
Best seasons
Summer

Planting

  1. Use a pot with drainage holes and a well-draining potting mix.
  2. Plant a small starter plant, or sprinkle seeds on the surface and barely cover them. Seeds usually sprout in 1–2 weeks.
  3. Keep one strong plant per pot.
  4. Water well after planting, then set it in your sunniest spot.

Everyday care

  • Water lightly, only when the top inch of soil is dry.
  • Oregano needs lots of sun. Use a south-facing window or a grow light.
  • Go easy on fertilizer. Overfed oregano grows quickly but tastes weaker.
  • Pinch the tips now and then to keep it bushy.

Harvesting

  • Start picking when stems are 4–6 inches long.
  • Snip just above a pair of leaves. Flavor is strongest before the plant flowers.
  • Pinch off flower buds, and never take more than a third of the plant at once.

Watch out for

  • Yellow, droopy leaves: too much water.
  • Long, sparse stems: not enough light.
  • Weak flavor: too much fertilizer or too little sun.

Tip: Pinching the tips from the start makes oregano grow fuller and gives you more to harvest.

Herb

Basil

Fast, fragrant, and thirsty. Give it sun, warmth, and plenty of water.

Light
8–10 hours of sun a day, or a grow light
Water
Heavy: every 1–2 days. The soil should stay damp, never soggy
Best seasons
Spring + Summer

Planting

  1. Fill the pot with moist potting mix, stopping about an inch below the rim. It needs drainage holes.
  2. Sprinkle a few seeds over the surface and cover them with about ¼ inch of soil.
  3. Keep the soil moist and warm (above 70°F). Seedlings usually sprout in 5–10 days.
  4. When seedlings have two sets of true leaves, thin to the strongest one to three plants.

Everyday care

  • Water every 1–2 days. Check with a finger: if the top inch is dry, it is time.
  • Basil hates the cold. Keep it away from drafty windows, and bring it inside if nights dip below 50°F.
  • Feed with a balanced liquid fertilizer at half strength every 3–4 weeks.

Harvesting

  • Start picking once the plant has six to eight leaves.
  • Pinch each stem just above a pair of leaves. Two new shoots grow from that spot.
  • Pinch off flower buds as they appear, and never take more than a third of the plant at once.

Watch out for

  • Drooping leaves: usually thirsty. Basil wilts fast when dry.
  • Yellow leaves: the soil is staying soggy. Check that the pot drains.
  • Tall, pale, leggy plant: not enough light.
  • Black, limp leaves: the plant got chilled. Move it somewhere warmer.

Tip: Pinching the tips early makes basil grow bushy instead of tall.

Herb

Cilantro

Fast-growing and fresh-tasting, and happiest in mild weather.

Light
4–6 hours of sun a day
Water
Medium: water when the top inch of soil is dry
Best seasons
Spring, Summer + Fall

Planting

  1. Fill the pot with moist potting mix. It needs drainage holes.
  2. Sow seeds about ¼ inch deep and an inch apart. They usually sprout in 7–10 days.
  3. Plant seeds right in the pot. Cilantro does not like being moved once it has sprouted.
  4. Thin seedlings to about 2–3 inches apart.

Everyday care

  • Water when the top inch of soil is dry, and do not let the pot dry out completely.
  • Cilantro prefers mild weather. In hot spells, move it out of the afternoon sun.
  • Feed lightly with a balanced fertilizer every 3–4 weeks.

Harvesting

  • Start picking when the plant is about 6 inches tall, usually 3–4 weeks after sprouting.
  • Cut outer stems at the base and leave the center to keep growing.
  • Never take more than a third of the plant at once.

Watch out for

  • A tall, wispy stalk with feathery leaves: the plant is going to seed (bolting), usually from heat. Pick what you can and sow again.
  • Yellow leaves: too much water.
  • Stretched, pale stems: not enough light.

Tip: Sow a few new seeds every 2–3 weeks so you always have fresh cilantro coming along.

Herb

Parsley

Slow to start, then generous for months.

Light
4–6 hours of sun a day
Water
Medium: keep the soil evenly moist
Best seasons
Spring

Planting

  1. Fill the pot with moist potting mix. It needs drainage holes.
  2. Soak seeds in warm water overnight to help them sprout, then sow about ¼ inch deep.
  3. Be patient: parsley seeds can take 3–4 weeks to sprout. Keep the soil moist the whole time.
  4. Thin to the strongest one or two plants. Parsley has a long root, so avoid moving it later.

Everyday care

  • Keep the soil evenly moist, watering when the top inch starts to dry.
  • Parsley does fine with 4–6 hours of sun and tolerates a little shade.
  • Feed lightly with a balanced fertilizer about once a month.

Harvesting

  • Start picking when stems have three sets of leaves.
  • Cut the outer stems at the base and leave the center to keep growing.
  • Never take more than a third of the plant at once.

Watch out for

  • Yellow outer leaves: too much water, or just old leaves. Trim them off.
  • No sprouts after two weeks: keep waiting. Parsley is slow.
  • Striped green caterpillars: pick them off, or let them be. They turn into swallowtail butterflies.

Tip: Be patient with seeds. Parsley can take up to a month to sprout.

Leafy green

Spinach

A cool-weather green that grows well in shallow pots, even in winter.

Light
4–6 hours of sun a day
Water
Medium: keep the soil evenly moist
Best seasons
Spring, Fall + Winter

Planting

  1. Fill the pot with moist potting mix. It needs drainage holes.
  2. Sow seeds about ½ inch deep and an inch apart. They usually sprout in 5–14 days.
  3. Spinach sprouts best in cool soil, around 45–70°F. It will not sprout well in heat.
  4. Thin seedlings to about 3–4 inches apart. The thinnings make good baby greens.

Everyday care

  • Keep the soil evenly moist, and water when the top inch is dry.
  • Spinach likes cool temperatures, about 50–70°F. Indoors in winter, use a bright window or a grow light.
  • Feed lightly with a balanced fertilizer every 2–3 weeks.

Harvesting

  • Pick baby leaves when they are 3–4 inches long, or let them grow to full size.
  • Take the outer leaves and leave the center to keep growing.
  • Or cut the whole plant about an inch above the soil. It may regrow.

Watch out for

  • A tall center stalk and bitter leaves: too warm. Pick what you can and sow again somewhere cooler.
  • Yellow lower leaves: too much water, or the plant needs feeding.
  • Holes or winding trails in leaves: pests such as slugs or leaf miners. Pick them off by hand.

Tip: Spinach loves cool temperatures, which makes it a good choice for fall and winter windowsills.

Leafy green

Lettuce

A cool-weather crop that grows in a shallow pot and keeps giving.

Light
4–6 hours of sun a day
Water
Heavy: keep the soil evenly moist and check it every day
Best seasons
Spring + Fall

Planting

  1. Fill the pot with moist potting mix. It needs drainage holes.
  2. Scatter seeds thinly over the surface and cover with a light dusting of soil, about ¼ inch.
  3. Water gently. Seeds sprout in 2–7 days and do best at 60–70°F.
  4. Thin seedlings to about 4 inches apart. The thinnings make tasty baby greens.

Everyday care

  • Lettuce is thirsty. Check the soil every day, and water gently so it stays evenly moist.
  • Lettuce turns bitter in heat. Move the pot to shade when temperatures climb above about 75°F.
  • Feed lightly with a balanced fertilizer every 2–3 weeks.

Harvesting

  • Pick the outer leaves when they are 4–6 inches long and leave the center to keep growing.
  • Or cut the whole plant about an inch above the soil. It often regrows for a second harvest.
  • Rinse and eat soon after picking for the best flavor.

Watch out for

  • Bitter taste or a tall center stalk: too hot. Pull it up and replant.
  • Holes in leaves: slugs or caterpillars. Pick them off by hand.
  • Wilting in moist soil: too hot, or the pot is not draining.

Tip: Sow a small new batch every two weeks for a steady supply of fresh leaves.

Leafy green

Arugula

A peppery, fast-growing green that is ready to pick in about a month.

Light
4–6 hours of sun a day
Water
Medium: water when the top inch of soil is dry
Best seasons
Spring, Summer + Fall

Planting

  1. Fill the pot with moist potting mix. It needs drainage holes.
  2. Scatter seeds over the surface and cover with about ¼ inch of soil.
  3. Water gently. Arugula sprouts fast, usually in 3–7 days.
  4. Thin seedlings to about 3–4 inches apart. Eat the thinnings as baby greens.

Everyday care

  • Water when the top inch of soil is dry, and keep it from drying out completely.
  • Arugula grows best in cool weather. Heat makes the leaves spicier and sends the plant to seed.
  • Feed lightly with a balanced fertilizer every 2–3 weeks.

Harvesting

  • Pick baby leaves when they are 3–4 inches long, usually 3–4 weeks after sprouting.
  • Take the outer leaves and leave the center to keep growing. You can pick again in a week or so.
  • Young leaves taste milder. Older leaves get sharper.

Watch out for

  • Very spicy or bitter leaves: too hot, or the leaves are old. Pick younger leaves.
  • Tiny holes in leaves: flea beetles. Pick off what you can and keep the soil moist.
  • A tall flower stalk: the plant is going to seed. The flowers are edible, then sow again.

Tip: Pick young leaves for a milder flavor. Older leaves get sharper and spicier.

General guidance for growing in containers in Connecticut. Timing and sizes are approximate and vary with the variety, your window or yard, and the weather.

Fundraising

Every dollar helps us teach people to build and use Growing Kits, run container garden classes, and bring fresh produce to communities across Connecticut. Give directly today, or join us at an upcoming event.

Month Year

SMTWTFS

Upcoming Events

Growing Kits & More

We're working on something. Container garden kits coming soon.

[ Product photo coming soon ]

Container Garden Kit

Price: TBD

Everything you need to start growing at home. Seeds, soil, container, and a getting-started guide — all in one box.

✓ You're on the list! We'll reach out when kits launch.

Supporting Communities
Through Gardening

Every kit sold helps fund our classes teaching people to build and use Growing Kits. We believe growing food should be accessible to everyone — and your purchase makes that possible.

More products are in development. Sign up to be notified when we launch.

Get Involved

Meet the Team

Student-run from the ground up. Literally.

DL

Derin Leon

Founder · General Manager · Marketing Director

Oversees day-to-day organization for the club — coordinating members, assigning tasks, and running Grow CT's Instagram and fundraiser announcements. Class of 2028.

LF

Levi Fieldman

Co-Founder · Finance Coordinator · Volunteer Coordinator

Manages the club's budget and resource allocation, and coordinates volunteering opportunities for members. Class of 2028.

JP

James Papp

Co-Founder · Communications Manager

Leads communication with Grow CT's partner organizations. Class of 2028.

MR

Mateo Riera

Director of Club Involvement

Helps drive student involvement and engagement within the club. Class of 2028.

Get in Touch

We'd love to hear from you.

Whether you're a community org interested in partnering, a parent with questions, or just curious about what we do — reach out anytime.

Send us a message

✓ Message received!

We'll get back to you as soon as we can.